AngularNGXS . 5 min read
Angular NGXS CRUD Example

What is NGXS?
NGXS is a state management pattern + library for Angular. It acts as a single source of truth for your application’s state, providing simple rules for predictable state mutations.
NGXS is modeled after the CQRS pattern popularly implemented in libraries like Redux and NGRX but reduces boilerplate by using modern TypeScript features such as classes and decorators.
There are 4 major concepts to NGXS:
- Store: Global state container, action dispatcher and selector
- Actions: Class describing the action to take and its associated metadata
- State: Class definition of the state
- Selects: State slice selectors
Angular NGXS CRUD Tutorial
In this tutorial, we will use Angular 8 with NGXS to create a simple CRUD application consuming dummy REST APIs.
Step 1: Install Angular CLI
For creating a new angular project we will be using Angular CLI, use the following command to install it
npm install -g @angular/cli# or
yarn add global @angular/cliCreate a new Angular project,
ng new ngxs-crud-appStep 2: Install NGXS Store and plugins
To install NGXS Store, simply fire this command
cd ngxs-crud-appnpm install @ngxs/store --save
# or if you are using yarn
yarn add @ngxs/storeAfter the successful installation of @ngxs/store, add logger-plugin and devtools-plugin as development dependencies,
yarn add @ngxs/logger-plugin @ngxs/devtools-plugin --devThen import these modules in app.module.ts,
import {BrowserModule} from '@angular/platform-browser';
import {NgModule} from '@angular/core';
import {AppRoutingModule} from './app-routing.module';
import {AppComponent} from './app.component';
import {NgxsModule} from '@ngxs/store';
import {NgxsReduxDevtoolsPluginModule} from '@ngxs/devtools-plugin';
import {NgxsLoggerPluginModule} from '@ngxs/logger-plugin';

@NgModule({
    declarations: [
        AppComponent
    ],
    imports: [
        BrowserModule,
        NgxsModule.forRoot(),
        NgxsReduxDevtoolsPluginModule.forRoot(),
        NgxsLoggerPluginModule.forRoot(),
        AppRoutingModule
    ],
    providers: [],
    bootstrap: [AppComponent]
})
export class AppModule {
}
To start the Angular development server, fire this command
ng serve -oStep 3: Create Model
Inside src > app, create a new folder called models, inside that folder create a new file called Todo.ts
export interface Todo {
    userId: number;
    id: number;
    title: string;
    completed: boolean;
}
Step 4: Define Actions
Again create a new folder, actions inside src > app. Inside the actions folder, let’s create a new file todo.action.ts. We will be creating four actions for CRUD operation.
import {Todo} from '../models/Todo';

export class AddTodo {
    static readonly type = '[Todo] Add';

    constructor(public payload: Todo) {
    }
}

export class GetTodos {
    static readonly type = '[Todo] Get';
}

export class UpdateTodo {
    static readonly type = '[Todo] Update';

    constructor(public payload: Todo, public id: number) {
    }
}

export class DeleteTodo {
    static readonly type = '[Todo] Delete';

    constructor(public id: number) {
    }
}

export class SetSelectedTodo {
    static readonly type = '[Todo] Set';

    constructor(public payload: Todo) {
    }
}
Step 5: Create components
Let’s create two components, a todo form which we will use to add/update todos and a todo list component to show the todo list. For quick prototyping, we will be using bootstrap. To install Bootstrap 4, use the following command
yarn add bootstrap
or
npm install bootstrap --save
Now, add the following line of code in style.scss file
@import "~bootstrap/dist/css/bootstrap.min.css"After this let’s create the components,
ng g c list --spec=false
ng g c form --spec=false
Now open the app.component.html file and add this code,
<div class="container">
    <div class="row">
        <div class="col-md-6">
            <app-form></app-form>
        </div>
        <div class="col-md-6">
            <app-list></app-list>
        </div>
    </div>
</div>
Step 6: Create a service
In this step, we will create a todo service
ng g service todo --spec=falseSince in this tutorial, we are making REST API calls to perform CRUD operations we need to import the Angular HttpClientModule in our app.module.ts, let’s also add ReactiveFormsModule for the todo form
import {BrowserModule} from '@angular/platform-browser';
import {NgModule} from '@angular/core';
import {AppRoutingModule} from './app-routing.module';
import {AppComponent} from './app.component';
import {NgxsModule} from '@ngxs/store';
import {NgxsReduxDevtoolsPluginModule} from '@ngxs/devtools-plugin';
import {NgxsLoggerPluginModule} from '@ngxs/logger-plugin';
import {ListComponent} from './list/list.component';
import {FormComponent} from './form/form.component';
import {HttpClientModule} from '@angular/common/http';
import {ReactiveFormsModule} from '@angular/forms';

@NgModule({
    declarations: [
        AppComponent,
        ListComponent,
        FormComponent
    ],
    imports: [
        BrowserModule,
        NgxsModule.forRoot(),
        NgxsReduxDevtoolsPluginModule.forRoot(),
        NgxsLoggerPluginModule.forRoot(),
        HttpClientModule,
        ReactiveFormsModule,
        AppRoutingModule
    ],
    providers: [],
    bootstrap: [AppComponent]
})
export class AppModule {
}
Now let’s add HTTP calls to fetch, update, add and delete to-do items. In this tutorial, we are using JSONPlaceholder for making fake API calls
import {Injectable} from '@angular/core';
import {HttpClient} from '@angular/common/http';
import {Todo} from './models/Todo';

@Injectable({
    providedIn: 'root'
})
export class TodoService {

    constructor(private http: HttpClient) {
    }

    fetchTodos() {
        return this.http.get<Todo[]>('https://jsonplaceholder.typicode.com/todos');
    }

    deleteTodo(id: number) {
        return this.http.delete('https://jsonplaceholder.typicode.com/todos/' + id);
    }

    addTodo(payload: Todo) {
        return this.http.post<Todo>('https://jsonplaceholder.typicode.com/todos', payload);
    }

    updateTodo(payload: Todo, id: number) {
        return this.http.put<Todo>('https://jsonplaceholder.typicode.com/todos/' + id, payload);
    }
}
Step 7: Define a state
In NGXS, states are classes along with decorators to describe metadata and action mappings. So let’s create a states folder inside src >> app and inside that folder, create one file called todo.state.ts
import {State, Action, StateContext, Selector} from '@ngxs/store';
import {Todo} from '../models/Todo';
import {AddTodo, DeleteTodo, GetTodos, SetSelectedTodo, UpdateTodo} from '../actions/todo.action';
import {TodoService} from '../todo.service';
import {tap} from 'rxjs/operators';

export class TodoStateModel {
    todos: Todo[];
    selectedTodo: Todo;
}

@State<TodoStateModel>({
    name: 'todos',
    defaults: {
        todos: [],
        selectedTodo: null
    }
})
export class TodoState {

    constructor(private todoService: TodoService) {
    }

    @Selector()
    static getTodoList(state: TodoStateModel) {
        return state.todos;
    }

    @Selector()
    static getSelectedTodo(state: TodoStateModel) {
        return state.selectedTodo;
    }

    @Action(GetTodos)
    getTodos({getState, setState}: StateContext<TodoStateModel>) {
        return this.todoService.fetchTodos().pipe(tap((result) => {
            const state = getState();
            setState({
                ...state,
                todos: result,
            });
        }));
    }

    @Action(AddTodo)
    addTodo({getState, patchState}: StateContext<TodoStateModel>, {payload}: AddTodo) {
        return this.todoService.addTodo(payload).pipe(tap((result) => {
            const state = getState();
            patchState({
                todos: [...state.todos, result]
            });
        }));
    }

    @Action(UpdateTodo)
    updateTodo({getState, setState}: StateContext<TodoStateModel>, {payload, id}: UpdateTodo) {
        return this.todoService.updateTodo(payload, id).pipe(tap((result) => {
            const state = getState();
            const todoList = [...state.todos];
            const todoIndex = todoList.findIndex(item => item.id === id);
            todoList[todoIndex] = result;
            setState({
                ...state,
                todos: todoList,
            });
        }));
    }


    @Action(DeleteTodo)
    deleteTodo({getState, setState}: StateContext<TodoStateModel>, {id}: DeleteTodo) {
        return this.todoService.deleteTodo(id).pipe(tap(() => {
            const state = getState();
            const filteredArray = state.todos.filter(item => item.id !== id);
            setState({
                ...state,
                todos: filteredArray,
            });
        }));
    }

    @Action(SetSelectedTodo)
    setSelectedTodoId({getState, setState}: StateContext<TodoStateModel>, {payload}: SetSelectedTodo) {
        const state = getState();
        setState({
            ...state,
            selectedTodo: payload
        });
    }
}
In the todo state, we have defined five actions and two selectors.
In the getTodos action, we are calling the getTodos method of the todoService that we have created in the previous step to fetch the todo list from the API and update the todos state which could be used by any component, in our case, it would be list.component.ts. Similarly, the other three actions addTodo, deleteTodo, updateTodo, and setSelectedTodoId are also calling the service methods and updating the state.
Now update the app.module.ts,
import {BrowserModule} from '@angular/platform-browser';
import {NgModule} from '@angular/core';
import {AppRoutingModule} from './app-routing.module';
import {AppComponent} from './app.component';
import {NgxsModule} from '@ngxs/store';
import {NgxsReduxDevtoolsPluginModule} from '@ngxs/devtools-plugin';
import {NgxsLoggerPluginModule} from '@ngxs/logger-plugin';
import {ListComponent} from './list/list.component';
import {FormComponent} from './form/form.component';
import {HttpClientModule} from '@angular/common/http';
import {ReactiveFormsModule} from '@angular/forms';
import {TodoState} from './states/todo.state';

@NgModule({
    declarations: [
        AppComponent,
        ListComponent,
        FormComponent
    ],
    imports: [
        BrowserModule,
        NgxsModule.forRoot([
            TodoState
        ]),
        NgxsReduxDevtoolsPluginModule.forRoot(),
        NgxsLoggerPluginModule.forRoot(),
        HttpClientModule,
        ReactiveFormsModule,
        AppRoutingModule
    ],
    providers: [],
    bootstrap: [AppComponent]
})
export class AppModule {
}
Step 8: Display the todo list
Add the following code in list.component.ts
import {Component, OnInit} from '@angular/core';
import {TodoState} from '../states/todo.state';
import {Select, Store} from '@ngxs/store';
import {Todo} from '../models/Todo';
import {Observable} from 'rxjs';
import {DeleteTodo, GetTodos, SetSelectedTodo} from '../actions/todo.action';

@Component({
    selector: 'app-list',
    templateUrl: './list.component.html',
    styleUrls: ['./list.component.scss']
})
export class ListComponent implements OnInit {
    @Select(TodoState.getTodoList) todos: Observable<Todo[]>;

    constructor(private store: Store) {
    }

    ngOnInit() {
        this.store.dispatch(new GetTodos());
    }

    deleteTodo(id: number) {
        this.store.dispatch(new DeleteTodo(id));
    }

    editTodo(payload: Todo) {
        this.store.dispatch(new SetSelectedTodo(payload));
    }

}
Here we are dispatching the GetTodos action and then using selector @Select slicing out the todos data from the store.
Also, add the following code in the list.component.html
<div class="col">
    <div *ngIf="todos">
        <table class="table table-striped">
            <thead>
            <tr>
                <th>Id</th>
                <th>Title</th>
                <th>Edit</th>
                <th>Delete</th>
            </tr>
            </thead>
            <tbody>
            <tr *ngFor="let todo of todos | async">
                <td>{{ todo.id }}</td>
                <td>{{ todo.title }}</td>
                <td>
                    <button class="btn btn-primary" (click)="editTodo(todo)">Edit</button>
                </td>
                <td>
                    <button class="btn btn-primary" (click)="deleteTodo(todo.id)">Delete</button>
                </td>
            </tr>
            </tbody>
        </table>
    </div>
</div>
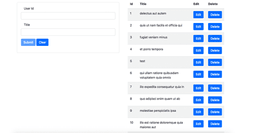
With the click of the delete button, our component dispatches deleteTodo action which calls the delete API and removes the item from our todo state. And on the click of the Edit button, we dispatch the SetSelectedTodo action which stores that item as a selected todo.
Step 9: Display the Todo form
Add these lines of code in form.component.ts
import {Component, OnInit} from '@angular/core';
import {FormBuilder, FormGroup, Validators} from '@angular/forms';
import {Select, Store} from '@ngxs/store';
import {ActivatedRoute, Router} from '@angular/router';
import {TodoState} from '../states/todo.state';
import {AddTodo, SetSelectedTodo, UpdateTodo} from '../actions/todo.action';
import {Observable, Subscription} from 'rxjs';
import {Todo} from '../models/Todo';

@Component({
    selector: 'app-form',
    templateUrl: './form.component.html',
    styleUrls: ['./form.component.scss']
})
export class FormComponent implements OnInit, OnDestroy {
    @Select(TodoState.getSelectedTodo) selectedTodo: Observable<Todo>;
    todoForm: FormGroup;
    editTodo = false;
    private formSubscription: Subscription = new Subscription();

    constructor(private fb: FormBuilder, private store: Store, private route: ActivatedRoute, private router: Router) {
        this.createForm();
    }

    ngOnInit() {
        this.formSubscription.add(
          this.selectedTodo.subscribe(todo => {
            if (todo) {
              this.todoForm.patchValue({
                id: todo.id,
                userId: todo.userId,
                title: todo.title
              });
              this.editTodo = true;
            } else {
              this.editTodo = false;
            }
          })
        );
    }

    createForm() {
        this.todoForm = this.fb.group({
            id: [''],
            userId: ['', Validators.required],
            title: ['', Validators.required]
        });
    }

    onSubmit() {
        if (this.editTodo) {
          this.formSubscription.add(
            this.store.dispatch(new UpdateTodo(this.todoForm.value, this.todoForm.value.id)).subscribe(() => {
              this.clearForm();
            })
          );
        } else {
          this.formSubscription.add(
            this.formSubscription = this.store.dispatch(new AddTodo(this.todoForm.value)).subscribe(() => {
              this.clearForm();
            })
          );
        }
    }

    clearForm() {
        this.todoForm.reset();
        this.store.dispatch(new SetSelectedTodo(null));
    }
}
Also, add the following code in form.component.html
<div class="card mt-3">
    <div class="card-body">
        <form [formGroup]="todoForm" (ngSubmit)="onSubmit()">
            <div class="form-group">
                <label class="col-md-4">User Id</label>
                <input type="number" class="form-control" formControlName="userId" #userId/>
                <div *ngIf="todoForm.controls['userId'].invalid && (todoForm.controls['userId'].dirty || todoForm.controls['userId'].touched)"
                     class="alert alert-danger">
                    <div *ngIf="todoForm.controls['userId'].errors.required">
                        User Id is required.
                    </div>
                </div>
            </div>
            <div class="form-group">
                <label class="col-md-4">Title</label>
                <input type="title" class="form-control" formControlName="title" #title/>
                <div *ngIf="todoForm.controls['title'].invalid && (todoForm.controls['title'].dirty || todoForm.controls['title'].touched)"
                     class="alert alert-danger">
                    <div *ngIf="todoForm.controls['title'].errors.required">
                        Title is required.
                    </div>
                </div>
            </div>
            <div class="form-group">
                <button type="submit"
                        class="btn btn-primary mr-1"
                        [disabled]="todoForm.pristine || todoForm.invalid">Submit
                </button>
                <button class="btn btn-primary" (click)="clearForm()">Clear</button>
            </div>
        </form>
    </div>
</div>
Here we have created a form which we use for updating or adding a todo, in this component we are using a selector getSelectedTodo on basis of which we dispatch either UpdateTodo or AddTodo action.
You can find all the source code in this repository Github.
Hey!
Need help with software development or extending your team? You’re in the right place.
Let’s make cool things happen 🚀

